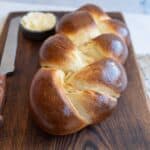
Soft and Fluffy Sourdough Challah Bread
Sourdough challah is a delicious blend of two baking traditions—traditional Jewish challah bread and tangy sourdough fermentation. This beautifully braided loaf has a tender, slightly sweet crumb and a gorgeous golden crust, perfect for celebrations or weekend baking.
Servings: 1 loaf
Ingredients
For the bread dough:
- 1 cup active bubbly sourdough starter (200 grams)
- 1/2 cup water (120 grams)
- ⅓ cup sugar (67 grams) or honey
- ⅓ cup light oil like avocado or canola, (80 grams)
- 3 large eggs
- 2 teaspoons salt (12 grams)
- 3 1/2 cups bread flour (460 grams)
For the Egg Wash:
- 1 large egg
- 1 tablespoon water
Instructions
- Feed your sourdough starter: Start by feeding your sourdough starter at least 4-12 hours before you begin, ensuring that it is active and bubbly.
- Mix the dough: The night before baking, add the sourdough starter, water, sugar, oil, eggs, salt, and 2 cups of flour to the bowl of your stand mixer and mix until well combined.
- Mix for an additional 5 minutes. Add the remaining flour a little at a time until a smooth dough forms (you may not need all of the flour), and mix for an additional 5 minutes.
- First rise: Remove the dough from the bowl and place it in a ceramic or glass bowl. Cover the bowl with plastic wrap, a damp towel, or a lid, and allow the dough to rise at room temperature for about 12-18 hours. It should roughly double in size.
- Divide and shape: In the morning, divide the dough into 3 equal portions. Roll each portion into a long log, about 18 inches long.
- Braid the challah: Lay the 3 dough ropes side by side. Pinch the ends of the ropes together. Braid the pieces together and tuck the ends under. Make sure all ends are well tucked under the loaf.
- Second rise: Place the braided loaf on a lined or greased baking sheet. Cover it with a clean towel and let it rise for another hour.
- Preheat the oven: Preheat your oven to 425°F (220°C).
- Apply the egg wash: In a small bowl, beat the egg and water together to make the egg wash. Brush the wash over the entire surface of the loaf.
- Bake the challah: Bake for 30-35 minutes or until it starts to turn golden brown. If the top browns too quickly, tent the loaf with aluminum foil to prevent over-browning.
- Cool and enjoy: Let the challah cool slightly before slicing.
Notes
- If you don’t have bread flour, you can substitute it with all-purpose flour. The dough might be a little softer and not hold its braided shape as well as with bread flour.
- Use just enough flour for the dough to come together after starting wet. Adding 1/4 cup at a time and letting it incorporate is a good rule of thumb.
- Be gentle in the braiding process! As the dough rises, it will fill any spaces so don't worry about your braid being "too loose."
- This braided bread is so gorgeous that it always makes a holiday dinner table look super fancy, and it looks way harder than it is!
Nutrition
Calories: 2960kcal | Carbohydrates: 433g | Protein: 82g | Fat: 97g | Saturated Fat: 17g | Polyunsaturated Fat: 14g | Monounsaturated Fat: 60g | Trans Fat: 0.1g | Cholesterol: 677mg | Sodium: 4931mg | Potassium: 692mg | Fiber: 12g | Sugar: 69g | Vitamin A: 992IU | Calcium: 176mg | Iron: 8mg
QR code
Scan this QR code with your phone's camera to view this recipe on your mobile device.
