How to Make Butter
I’m here to tell you all about How to Make Butter at Home-no cow required (although having cows is really fun!) You only need 2 things: cream and a mason jar!
Servings: 1 cup butter
Ingredients
- 1-2 cups good quality heavy whipping cream or raw fresh cream
- Quart mason jar with lid
- salt optional
Instructions
- Add your whipping cream to the mason jar and screw on the lid tightly. The amount of cream doesn't really matter, you'll end up with more or less butter depending on how much you use. Don't fill the jar less than 1/4 full or more than 1/2 full (if it's too full it doesn't have enough room to move around and agitate the butter out).
- Start shaking! We generally read a book or take turns while everyone else is cleaning up the kitchen.
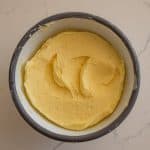
- Keep shaking! The cream will whip up to thick whip cream and you keep going. Once the cream breaks you'll have pieces of butter floating in buttermilk. Shake until it happens (the butter will be obviously yellow). It can take 15+ minutes, so don't lose heart.
- Once your butter and buttermilk have separated, place a fine mesh strainer over a large bowl and pour the contents of the jar into it. Save the buttermilk that falls into the bowl for cooking (like buttermilk biscuits), keep it in the fridge until you are ready to use.
- Use your hands to remove the butter from the strainer and press it into a ball.
- Turn your tap water onto cold and gently press the ball of butter in and out of shape to help press out the extra buttermilk. Do this for a few minutes or until you don't see anymore buttermilk come out.
- You can salt your butter if you'd like (we really like it salted, especially if you are putting it on fresh bread). I generally add a scant 1/4 teaspoon per 1 cup of butter, but feel free to add to taste. If adding salt, just mix it in.
- The butter is now ready to use! Enjoy with fresh bread or over your favorite waffles. If you are doing this with kids who just want to try it, you can also spread if on a cracker to try.
- We leave this butter out on the counter a few days to keep it soft but if you won't use it that quickly keep it covered in the fridge or freezer.
Notes
- If you are needing or wanting to make butter more often, the mason jar gets tedious. We had a milk cow for a little while and I made lots of butter. I tried churning it in the Kitchen Aid mixer, a Bosch mixer, in a food processor, AND the blender. My favorite option for making butter quickly often was using the blender. It was the fastest option and the blender didn't splatter the mess like the other appliances. I just blended for about 5 minutes (work in 1 minute increments) until I could see the butter. It was really easy!
- Make sure not to fill your mixer, blender, jar, etc. more than about half full so there is plenty of room for the whole process.
- Salting the butter will help it stay good longer.
- Don't forget to use up the buttermilk! There are so many delicious options: biscuits, pancakes, syrup, and more.
Nutrition
Serving: 1 tablespoon | Calories: 51kcal | Carbohydrates: 0.4g | Protein: 0.4g | Fat: 5g | Saturated Fat: 3g | Polyunsaturated Fat: 0.2g | Monounsaturated Fat: 1g | Cholesterol: 17mg | Sodium: 4mg | Potassium: 14mg | Sugar: 0.4g | Vitamin A: 219IU | Vitamin C: 0.1mg | Calcium: 10mg | Iron: 0.01mg
QR code
Scan this QR code with your phone's camera to view this recipe on your mobile device.
