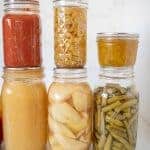
How to Can Food: Learn the Basics
Full tutorial on how to do water bath canning, so it's great for jams, jellies, fruit, tomato products, water bath salsa recipes, pickles and more!
Servings: 6
Ingredients
- Anything from the recipe! This is for water bath canning (so it's great for jams, jellies, fruit, tomato products, water bath salsa recipes, pickles and more!)
- Use approved recipes (see notes for details)
Instructions
- Wash you jars thoroughly with hot soapy water, rinse, and set aside.
- Next step is to put the canning rack in the bottom of a water bath canner. Fill the canner/pot half full with warm water.
- Fill your jars up with hot tap water (no need to add a lid), use the jar lifters to set the jars in the canner. This step sterilizes the jars and warms them up. Make sure the jars are covered by 1 to 2 inches of water, adding warm water to the pot as needed. Turn on the heat to low- medium. We don’t want the water boiling yet.
- Now it’s time to prepare the food you are canning. This could include mashing, peeling or coring and chopping depending on what you are canning. If you are new to canning get a book! The Ball Blue Book is my go to canning guide for basic recipes. There's a few different editions, the 2004 is my favorite one. You can also visit the National Center for Home Food Preservation website. It's full of the basic recipes you need for canning.
- Once your recipes/food is ready, it's time to fill those jars up using the approved recipes. Using the jar lifter, take one jar out of of the warm water, pour the warm water back into the canning pot, and put the warm jar down on a clean dish towel.
- Use your canning funnel and a ladle your food in the jar.
- It’s time to check for the headspace now. The headspace is the amount of space between the food and the top of the jar. This is an important step in preserving food. Remove the funnel and take a peak at how much space there is between the top of the food in the jar and the top of the jar. There should be about 1/2 inch of space at the time but all recipes vary, so be aware of that.
- Once the jar is filled properly, wipe down the mouth of the jar with a paper towel or damp cloth. If you leave some residue, this could make the lids not seal.
- Next, place a clean flat lid piece on the jar and screw on the ring (just wash the lids in the hot soapy water you washed the jars in). Be sure not to over tighten because this could ruin the seal as well, just tighten without adding too much pressure.
- Once the lid is on, use the jar lifter to lower back into the canner/pot. Continue until all of you jars are filled.
- We’ve made it to the processing step. Now that all of your jars are in the canner, put the lid on top and bring the water to a vigorous boil. Each recipe will tell you a specific processing time so follow that. Processing time does not start until the water is at a rolling boil.
- When the timer goes off for the recommended boiling time, turn off the heat and remove the canner lid. Wait 5 minutes before removing the jars.
- Now it’s safe to move the jars to a thick towel or a cutting board. Use the jar lifter and place the jars a few inches apart so they can cool at an even rate. The rings may not be as tight but don’t tighten them just yet.
- This is sometimes the stressful step-waiting for the cooling jars to make the “pop” sound indicating that they are sealed. The jars will be full cooled within 6 or so hours, but sometimes they'll seal within 30 minutes. You can check each jar to make sure it is properly vacuumed sealed by pressing on the center of the lid after a few hours. If the lid flexes at all, it is not properly sealed. You can still use that food but if won’t be shelf stable. Put any unsealed jars in the fridge and use those first.
- Store: Wipe off any remaining residue, label and then store the sealed jars in a cool, dry place.
Notes
- The Ball Blue Book is my go to canning guide for basic recipes. There's a few different editions, the 2004 is my favorite one. You can also visit the National Center for Home Food Preservation website. It's full of the basic recipes you need for canning.
- Water bath canning is for jams, jellies, fruit, tomato products, water bath salsa recipes, pickles and more! These are high acid foods. Water bath canning is not for low acid foods or mixed foods like green beans, potatoes, soups, meat, or broths.
- Canning is so fun but it is also a skill that you'll get better at as you go. Don't be afraid to start with a small batch of something to help you get more comfortable.
- If you live at high altitude, make sure you follow the processing guidelines for your area. If the recipes don't show high altitude directions, your local university's extension office will be a great resource.
Nutrition
Serving: 1 of 6 servings | Calories: 1kcal | Carbohydrates: 1g | Protein: 1g | Fat: 1g | Saturated Fat: 1g | Polyunsaturated Fat: 1g | Trans Fat: 1g | Cholesterol: 1mg | Sodium: 1mg | Fiber: 1g | Sugar: 1g
QR code
Scan this QR code with your phone's camera to view this recipe on your mobile device.
