Best Homemade Gingerbread House | Recipe + Template
on Dec 13, 2021, Updated Dec 27, 2024
This post may contain affiliate links. Please read our disclosure policy.

I’m sharing my family’s homemade Gingerbread House Recipe, plus a template for making festive holiday decorations! Making DIY gingerbread houses is a much loved holiday tradition and a perfect activity to bring friends and family together this season.
This gingerbread house turns out so darling and is super fun to create. They are made with a sturdy dough that is great for construction and tastes amazing, too.
I realize that you can buy pre-made gingerbread kits from the store but then you are missing out on the intoxicating smell filling your home and actual edible frosting. The store-bought kit candy always tastes weird to me and the royal frosting is just terrible! Give homemade gingerbread houses a shot. It is worth the extra effort. Let’s DO THIS!
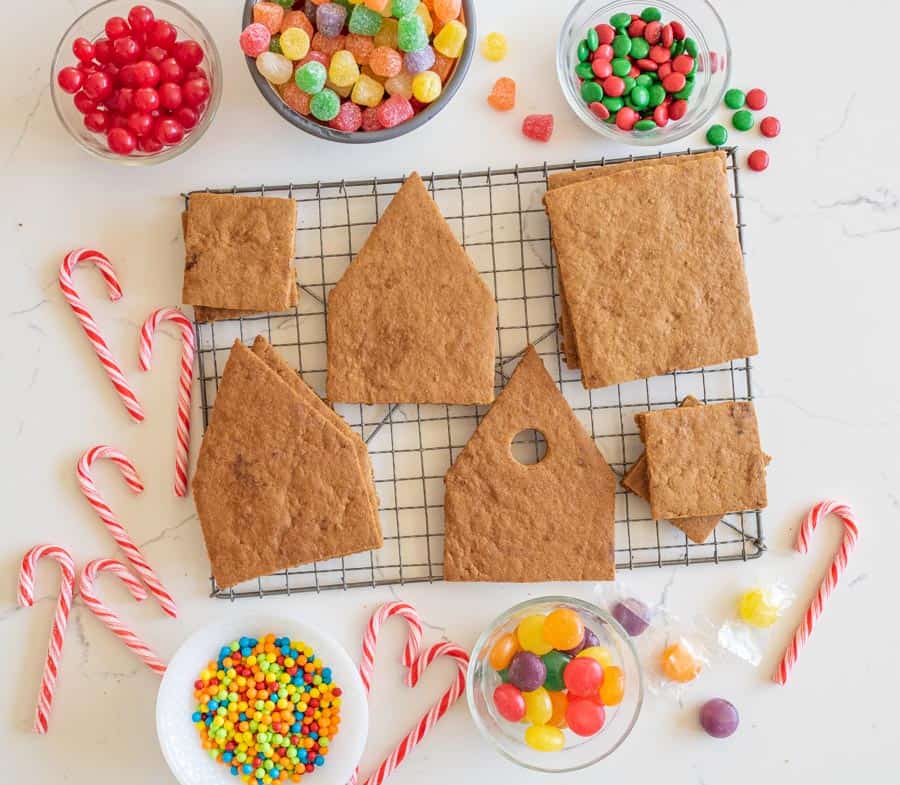
🍭 I have all the steps you need to get your house cut out so that it will fit together, TWO patterns for gingerbread houses – large and small, the best candy for gingerbread houses, royal icing recipes, and so many tips and tricks!
Table of Contents
Why You’ll Love This Gingerbread House Recipe
- Encourages Creativity: There is no right or wrong way to do it. Creativity is king and I love to see how everyone chooses to decorate their individual houses.
- Family Fun: The whole family, young and old will have a fabulous time designing at your holiday get together.
- Classic Gingerbread Taste: The rich and spicy flavor is quintessentially festive and delicious.
- Full Tutorial: These detailed step-by-step instructions guide you through each stage of the process, from making the dough to assembling and decorating the house, ensuring that even first-time bakers can achieve a beautiful and stable gingerbread house.
Free Gingerbread House Templates
Build your dream gingerbread house with these free templates! You will receive a small template and a larger template (see sizes below) delivered to your email.
Small Gingerbread House Template:
- Size: 5.5 inches wide (front of house), 6 inches tall, 4.75 inches long (side of house)
- You will need one batch of the dough recipe for this house.
Large Gingerbread House Template:
- Size: 9 inches wide (front of house), 7.5 inches tall, 8.5 inches long (side of house)
- You will need three batches of the dough recipe for this house.
GET THE SMALL & LARGE GINGERBREAD HOUSE TEMPLATES!
Recipe Ingredients
- Butter
- Sugar – Brown and powdered sugars
- Egg
- Molasses
- Flour – All-purpose
- Spices – Ground ginger, cinnamon, nutmeg, allspice, salt
- Baking soda
- Meringue powder – See notes for using egg whites instead of meringue powder.
- Assorted candies – I used cereal, pretzels, sprinkles, optional
See the recipe card below for full information on ingredients and quantities

How to Make a Gingerbread House
Step 1: Mix butter, brown sugar, egg, molasses, flour, spices, and salt until combined.
Step 2: Roll dough into a rectangle, bake at 360°F for 20 minutes.

Step 3: Cut house shapes and bake again for 10 minutes.
Step 4: Prepare Icing by beating powdered sugar, meringue powder, and water until smooth and thick.
Step 5: Use icing to glue house pieces together, support with cans, and let dry for 30 minutes.
Step 6: Apply icing and add candies or decorations. Let the house fully dry before displaying or eating, a minimum of 30 minutes.
Recipe FAQs
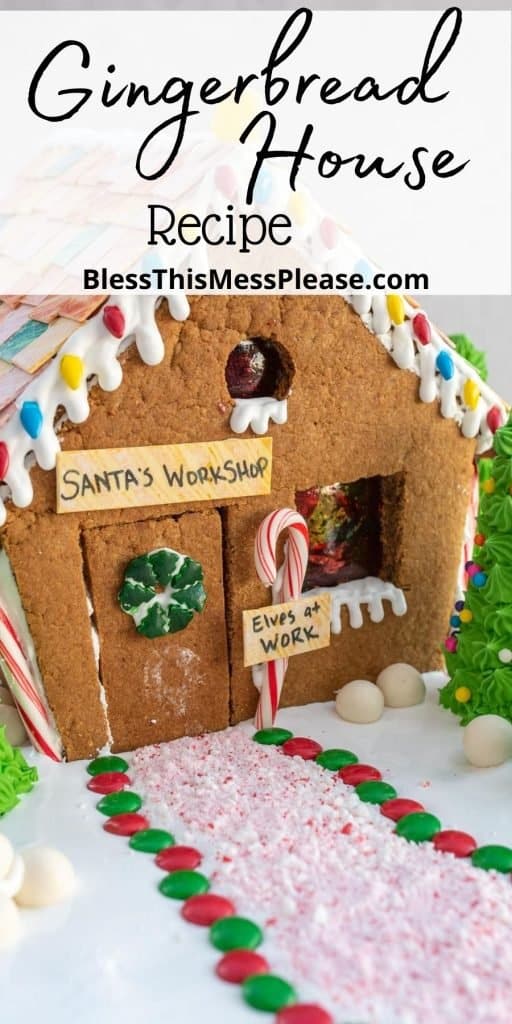
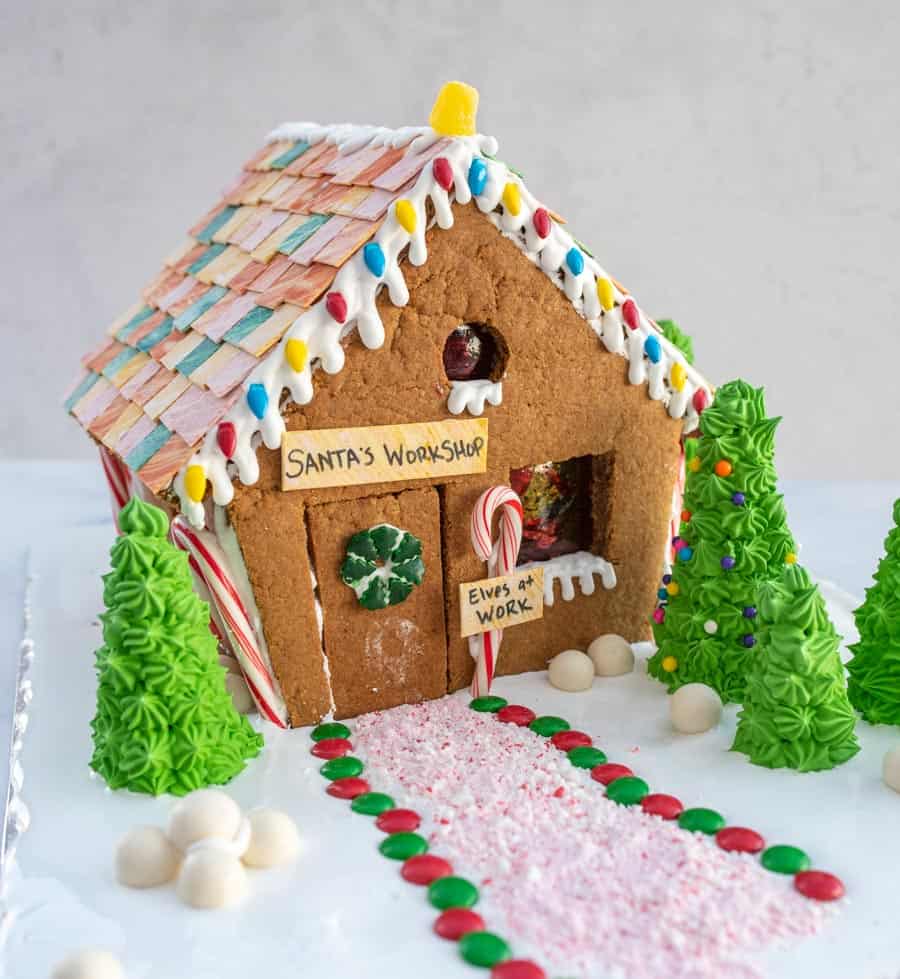
Royal icing is hands down the best option for gingerbread construction. It hardens up rock hard and is the glue that will hold the walls and roof of your house in place while still being edible. It’s also what you’ll use to attach your candies to your house.
For the base of the gingerbread house choose something flat and sturdy. You have lots of options! You can use a cardboard cake board, a large platter or plate, a pretty cookie sheet, a cutting board, or a cake stand.
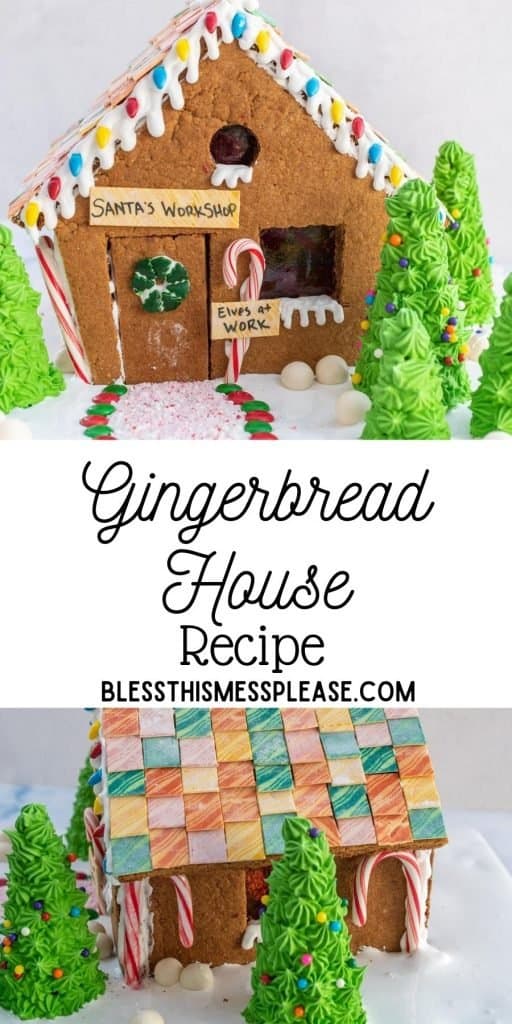
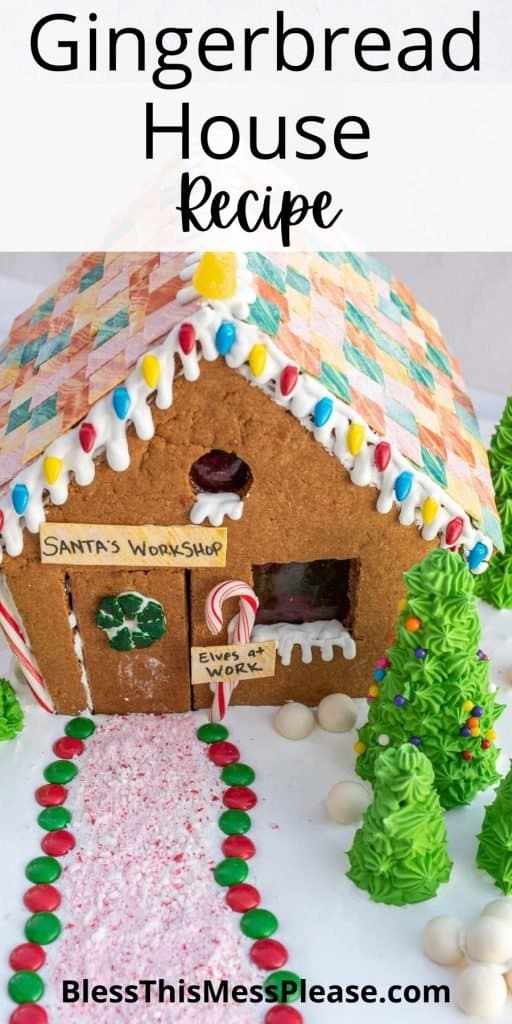
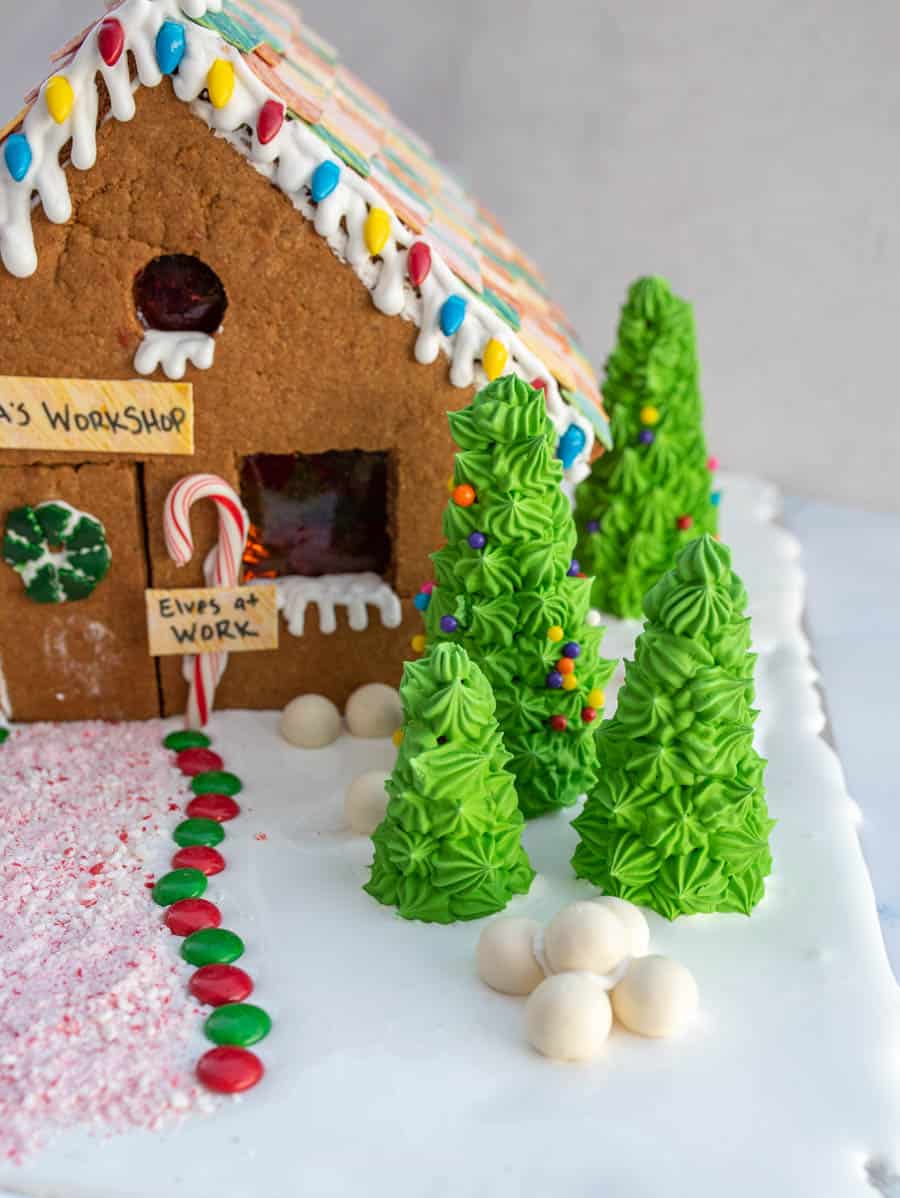
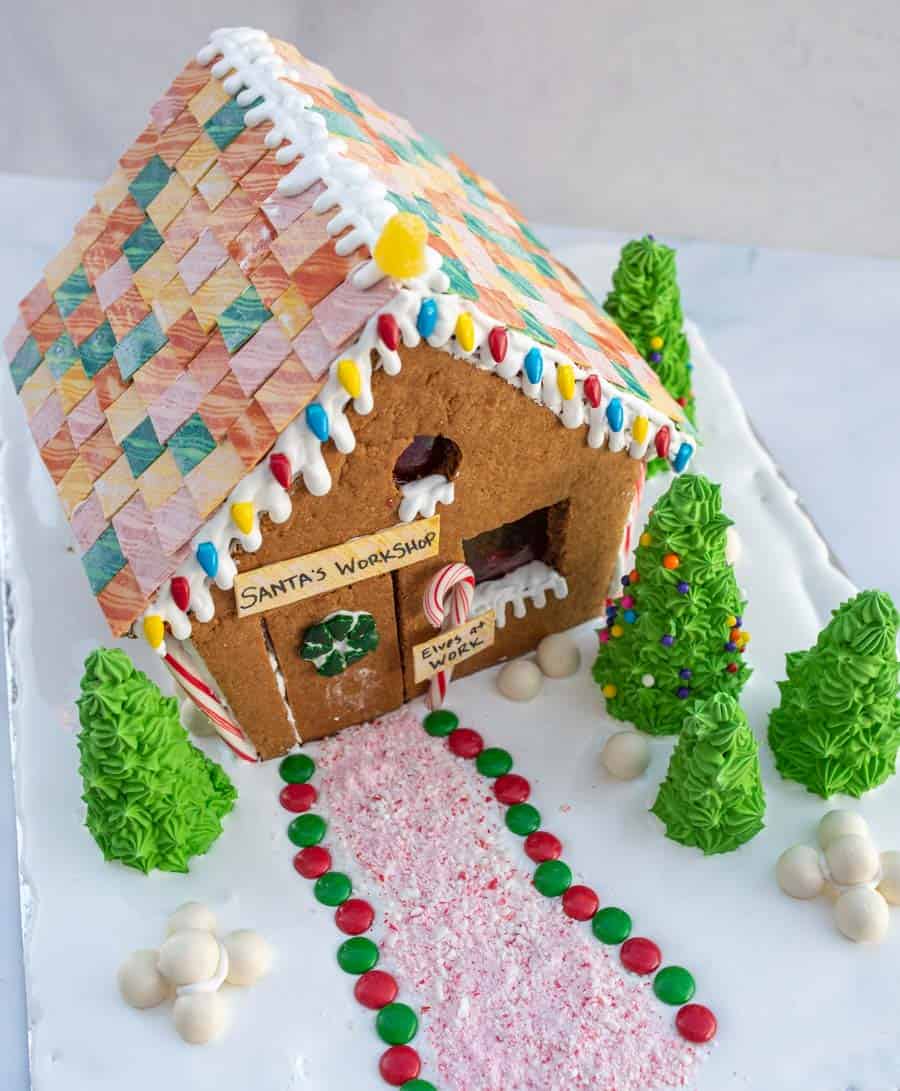
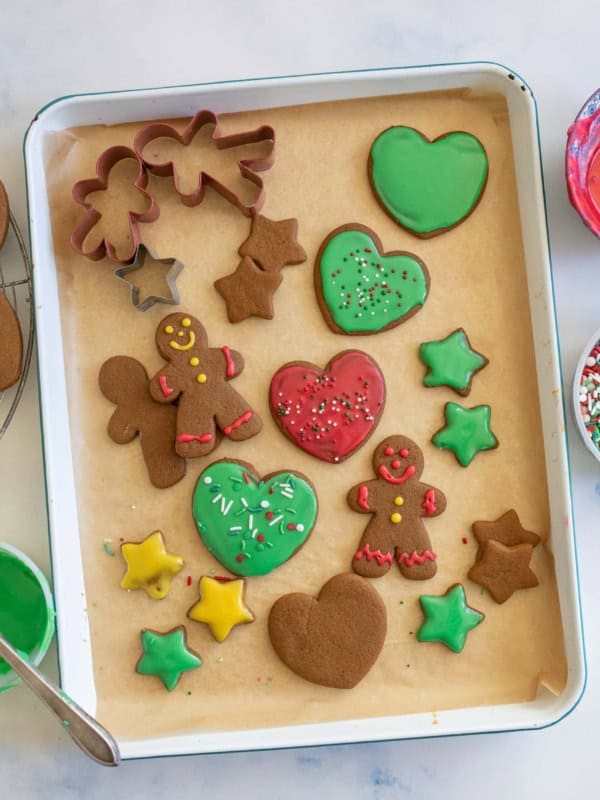
Feel free to use whatever you have on hand or your favorite candies to decorate your house with. Some popular ideas are gum drops, M&Ms, peppermints, Necco wafers, candy canes, mints, and anything red of green! And don’t stop at candy— you can use cereal, pretzels of different shapes, gum, sprinkles, and just about anything. I wrote a whole post all about the best candy for gingerbread houses, so if you need more information, check that out!
Expert Tips
- Prep Schedule: Spread the work over multiple days to reduce stress. Make the dough and bake on one day, assemble the house on another, and save the decoration for a final day.
- Foil Tip: If putting foil over cardboard as the base, be sure to glue the foil to the cardboard really well. I didn’t one year and the weight of the gingerbread house ripped the foil and the whole thing slid off—lesson learned!
- Egg Whites for Meringue: You can make royal icing without meringue powder and with egg whites instead. If you’d like to try that method, please see this royal icing post for that recipe.
- When to Cut Shapes: Cut out the house shapes from the baked slab so the edges are nice and straight and stay that way. This ensures cleaner edges, more sturdy pieces, and a well-structured house. If you cut the pieces and then bake, they will spread while baking.
- Rolling Into Shape: Spend time rolling the dough evenly to avoid uneven baking. Use a flat edge spatula or bench scraper to shape a perfect rectangle and redistribute excess dough where needed.
- Icing Tip: Ensure all bowls, spoons, and icing bags are completely grease-free to achieve the perfect consistency for royal icing. That fat keeps the icing from coming together and will ruin the batch.
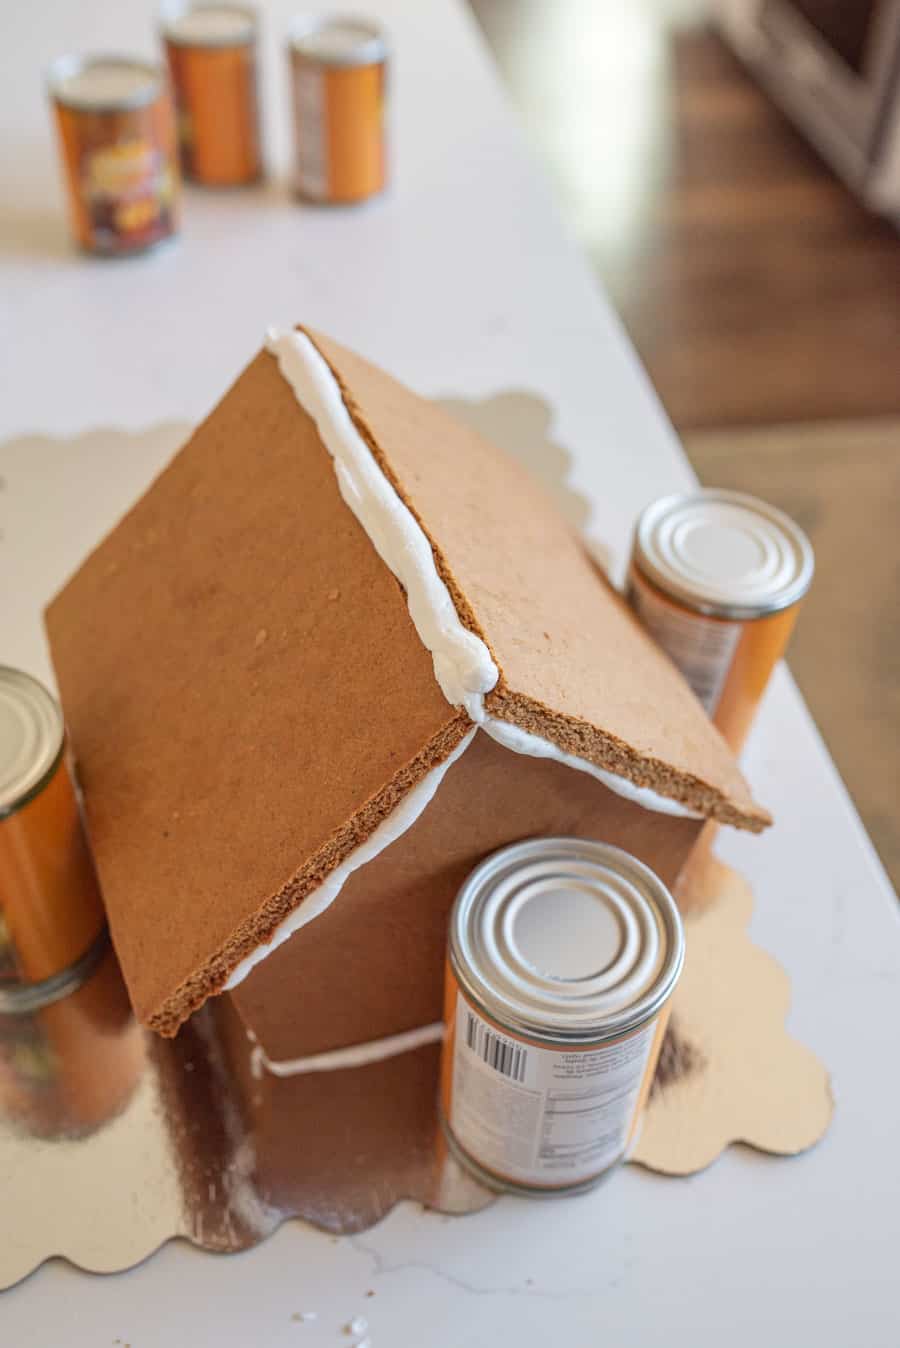
- Supporting the House: Use tin cans to support the walls and roof while the icing dries to keep the house stable and upright during assembly.
How to Serve and Store a DIY Gingerbread House
Once fully dry, display your gingerbread house as a festive centerpiece. If you wish to eat it, break off pieces to enjoy as a treat.
This is NOT my go-to gingerbread man cookie recipe! I LOVE this soft gingerbread cookie recipe and if you are looking for a cookie recipe, try that one. It’s perfection. Consider having a large batch of hot cocoa or apple cider going while you decorate your gingerbread houses!
If you plan to eat the gingerbread house within a few days, keep it covered with plastic wrap or stored in an airtight container at room temperature to maintain freshness.
To keep the gingerbread house for display throughout the season, store it in a cool, dry place away from direct sunlight.
If you live in a humid climate, consider using a dehumidifier in the storage area to prevent the gingerbread from becoming soft.

More Cut-Out Cookie Recipes to Consider
Simple Gingerbread Recipes
The Perfect Icing for Gingerbread Cookies

Cut Out Cookies
Sugar Cookie Icing Recipe for Perfect Holiday Decorating
From Scratch Recipes
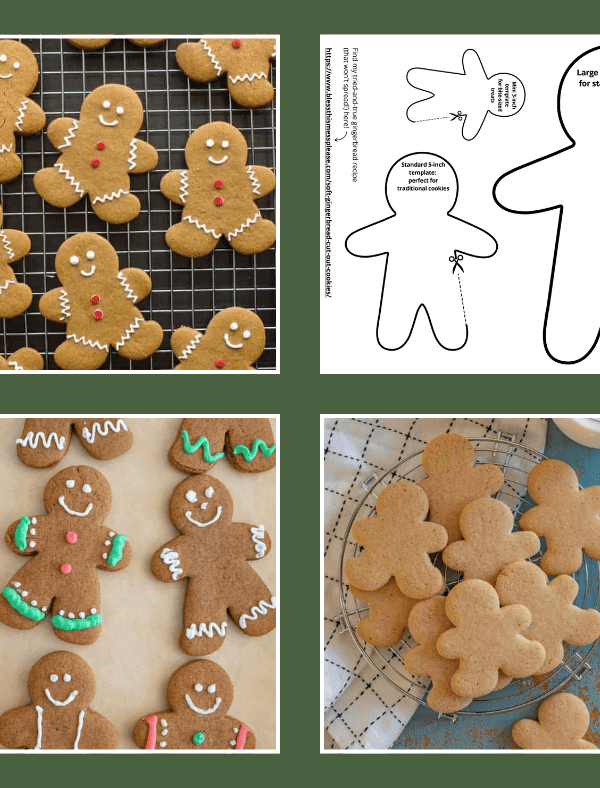
Free Printable Gingerbread Man Cookie Templates for Holiday Baking
Cookies
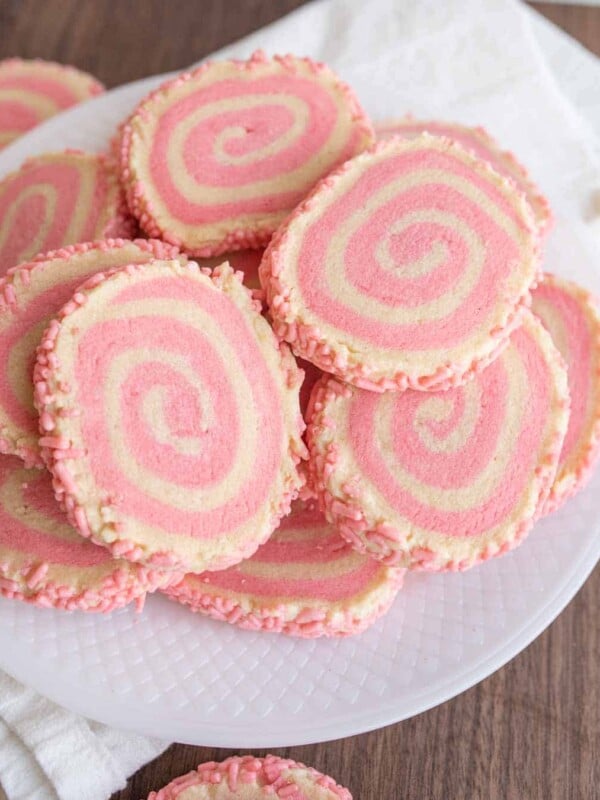
Pinwheel Cookies
Did you make this recipe? Leave a ⭐️ review and share it on Instagram, Facebook, or Pinterest!
Gingerbread House Recipe
Ingredients
For the gingerbread house:
- 1/2 cup butter, melted
- 3/4 cup brown sugar
- 1 large egg
- 1/4 cup molasses
- 2 2/3 cups flour
- 2 teaspoons ground ginger
- 1 teaspoon baking soda
- 1/2 teaspoon ground cinnamon
- 1/2 teaspoon ground nutmeg
- 1/2 teaspoon ground allspice
- 1/2 teaspoon salt
For the royal icing:
- 8 cups powdered sugar, confectioner's sugar (2 pound bag)
- 3 tablespoons meringue powder, see notes for using egg whites instead of meringue powder
- 10-15 tablespoons water
For decorating:
- assorted candies, cereal, pretzels, sprinkles, optional, (here are the best candy for gingerbread houses) (you can just use royal icing for decorating too)
Instructions
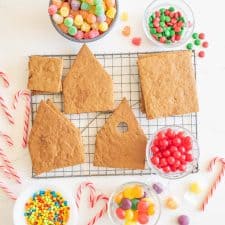
To make your gingerbread house dough and pieces:
- Download and print the gingerbread house patterns. Cut out the shapes.
- To make the large gingerbread house you’ll need 3 batches of this dough recipe and for the smaller house you’ll need a single batch of this recipe (the recipe as written).
- Preheat the oven to 360° F (a little hotter than 350° F helps the gingerbread to be crisper and sturdier).
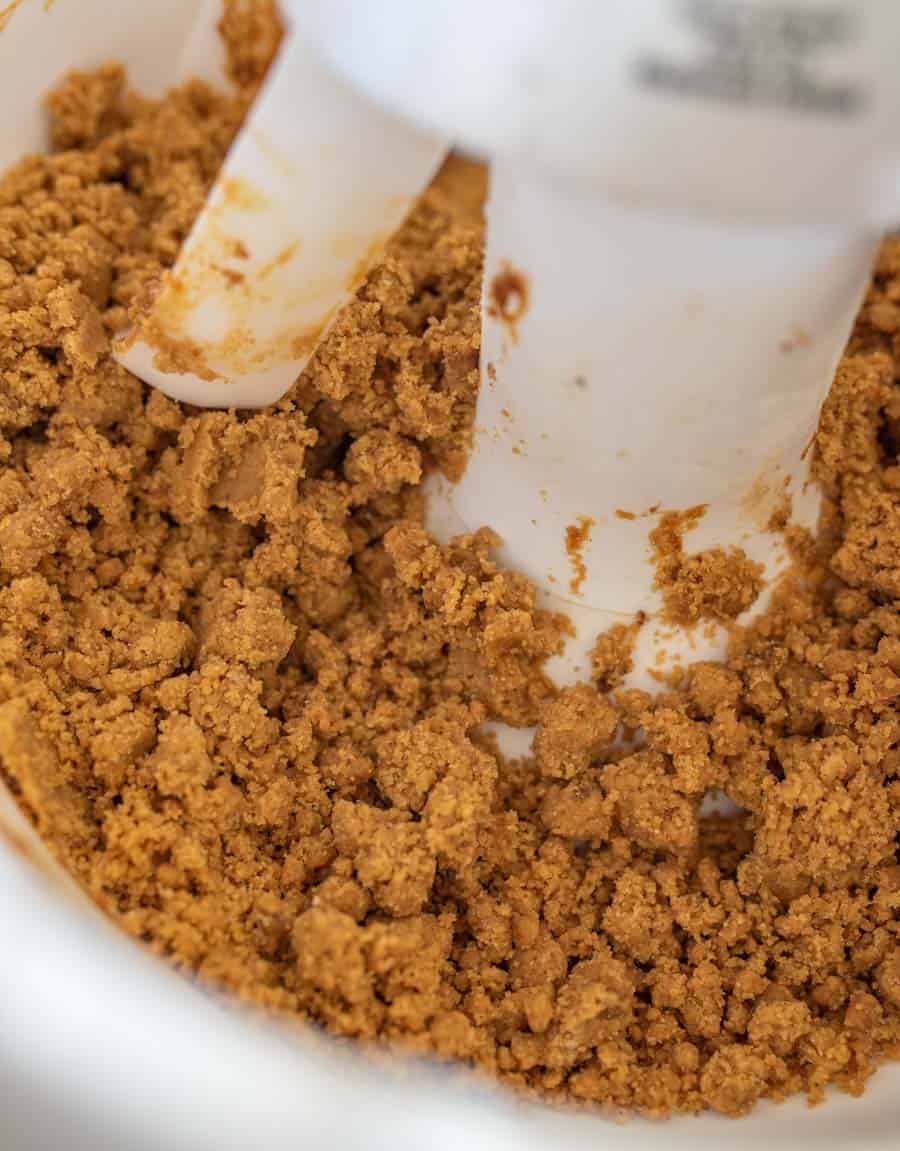
- In a large bowl beat together the butter and brown sugar until light and fluffy, about 2 minutes.
- Add the egg and molasses and beat to combine.
- Add the flour, ginger, baking soda, cinnamon, nutmeg, allspice, and salt and mix until well incorporated. The mixture will be crumbly.
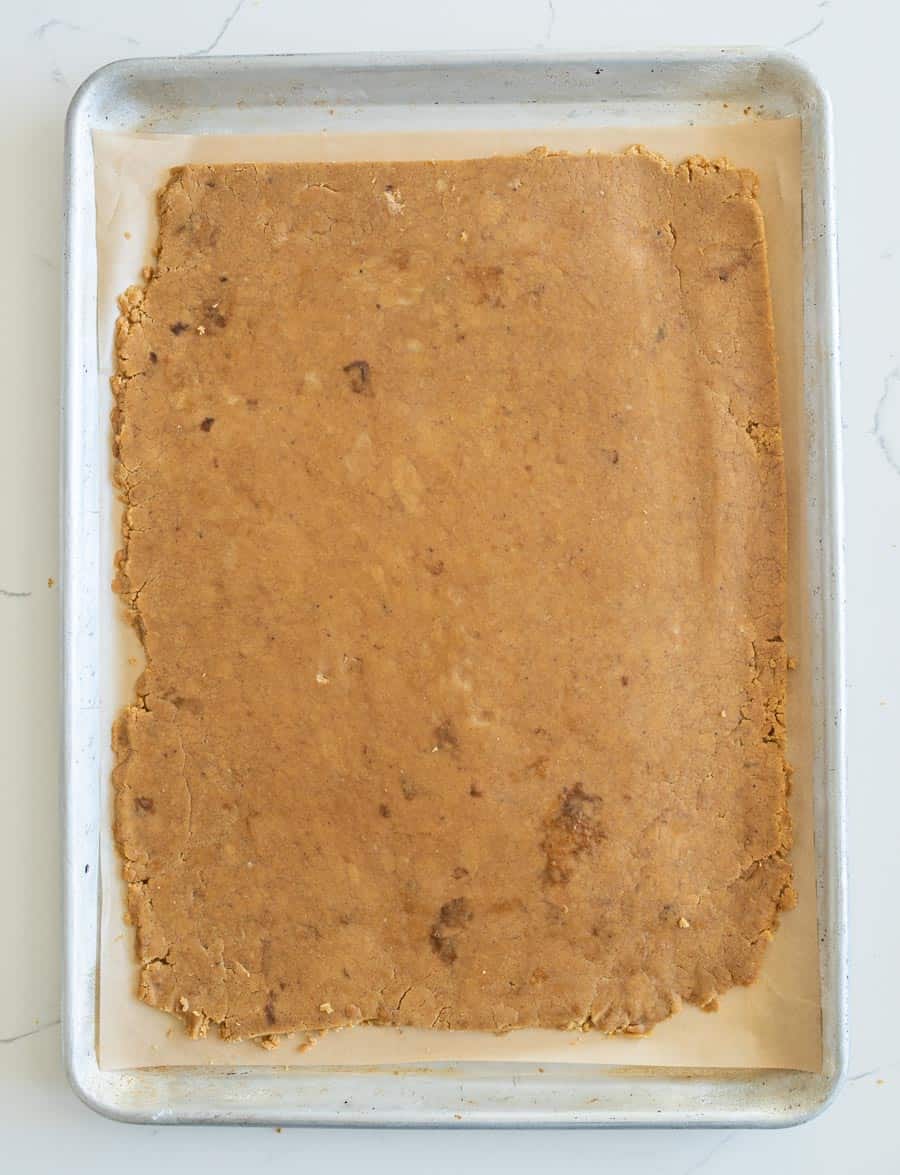
- Dump the crumbly dough into the center of a 15 by 11 inch piece of parchment paper.
- Use your hands and a rolling pin to press and roll the dough into a 13.5 by 10 inch rectangle. I normally start by pressing the dough with my hands, then rolling it out with a rolling pin. I’ll use a flat edge spatula or a bench scraper to cut extra long edges into more of a rectangle and I’ll press the pieces that I cut into spaces that need more dough. Once you do it a time or two you get the hang of it! Take your time here to get a nice rectangle, it’s ok to cut and patch the rectangle together, just roll it smooth.
- Gently lift opposite edges of the parchment paper and set it on a rimmed baking sheet.
- Bake the slab of gingerbread for 20 minutes.
- Remove from the oven and let cool 3-4 minutes.
- While still warm cut, place your paper pattern on top of the warm cookies slab and cut out the desired shapes using a small paring knife.
- Carefully remove the extra “scraps” of gingerbread around the pieces you just cut (save them to eat them, they are delicious!). If any of your house pieces need a little more trimming so they have straight edges, so that now.
- Return the gingerbread house pieces to the oven and bake for an additional 10 minutes.
- Remove from the oven and allow to cool fully before assembling.
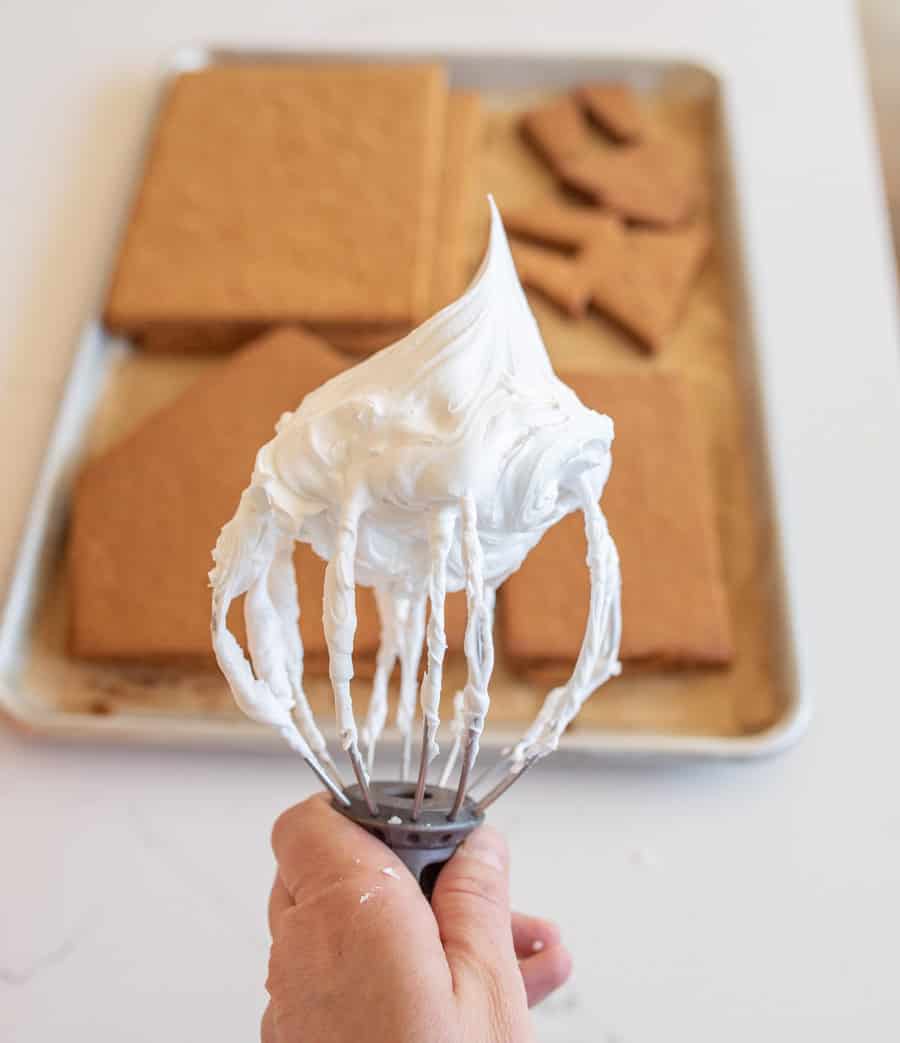
To make your royal icing:
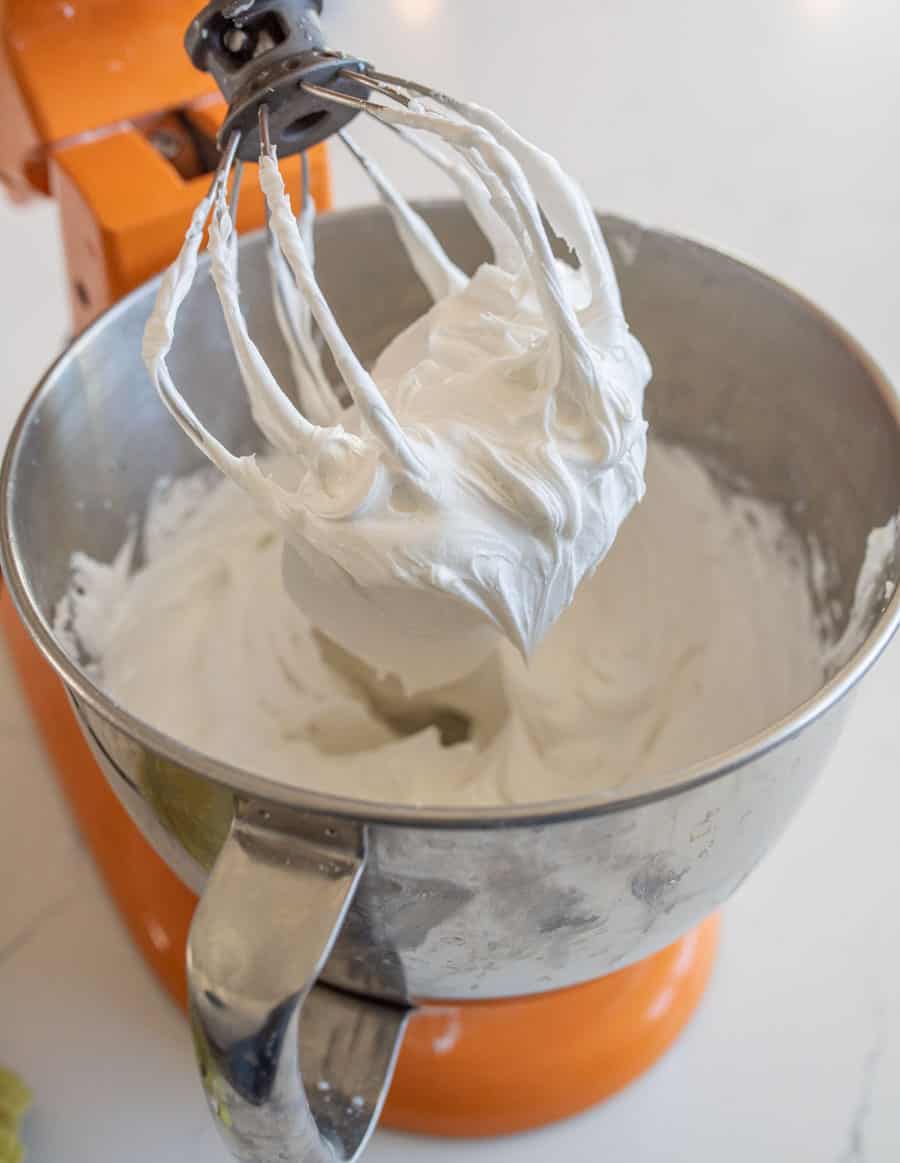
- While your gingerbread house pieces are cooling, make your royal icing.
- Add your powdered sugar and meringue powder to a large mixing bowl. Add 10 tablespoons of water to the bowl.
- Use a stand mixer or a hand mixer to beat until well incorporated. If the icing is very crumbly, add more water, 1 tablespoon at a time until it creates a thick but smooth icing. I normally end up adding 4 more tablespoons of water and sometimes the full 5, it’ll depend on how you measured your powdered sugar though.
- Beat until the icing is shiny, about 6-8 minutes with a stand mixer and 8-10 minutes with with a hand mixture.
- The icing should be thick but not so thick you can’t stir it with a spoon. Adjust the constancy as needed.
- When you aren’t working with your royal icing place a clean wet dish towel over the top of the icing so that it doesn’t start to harden. You can also press a piece of plastic wrap against the top of the icing.
To assemble your gingerbread house:
- To put your house together get a flat surface like a cake board, cutting board, or cookie sheet. Put about 2 cups of your royal icing in a piping bag or a good quality freezer zipper-topped plastic bag. Use a frosting tip that is about ½ inch wide circle or cut about ½ inch off the tip of one corner of your baggie. Take the end of a gingerbread house (one of the pointed end pieces) and pipe a thick line of icing along the bottom.
- Set it on your board where you want it to be and use tin cans to help support it.
- Pipe a thick line of icing on three sides (two short and one long side) of a side wall piece of the house.
- Place that piece on the inside of one side of the end house piece (take a look at where it hits the house, it’s on the inside of the end piece and you don’t see the edge of the wall, this is the easiest way to make the house stable.
- Pipe a thick layer of icing on the bottom of the other end other house and place it against the wall you just sat down.
- Pipe a thick layer of icing on three sides of the second wall piece and put it in between the front and back of the house, opposite of the other wall. Use cans to help support the structure as needed and let this much of the assembled house sit for 15 minutes to allow the icing time to harden.
- After your 15 minutes of waiting, pipe a thick layer of royal icing along the top of the walls and the angles of the roof.
- Add a thick layer of icing to one edge of one piece of roof (the wide edge), this will be where the roof comes to a point and touches the other piece of roof at the top ridge line of the roof. Place both pieces of the roof on top where they go and gently press into place. Use cans to support the roof as needed. Let the house dry for at least 30 minutes before decorating.
To decorate your gingerbread house:
- I like to move to a smaller icing tip or place more icing in another baggie and cut a smaller tip in the bag. You don’t need as much icing to decorate.
- You can use just icing to decorate, or you can use candies. This is the fun part! Place your candies out in little bowls (or in the sections of a muffin tin) and place things where you would like. You can use things like pretzels, gum, cereal, and more too. The sky is the limit when it comes to decorating your house. Enjoy the process and be creative!
- One you have added your candy, let the house dry another 30 or so minutes and it’s done! You can eat it within a few days (or even weeks, the cookie just gets hard), or you can keep it all season and enjoy the beauty.
Notes
- I think cutting the cookie pieces out of the cooked slab of gingerbread makes for a much sturdier and much easier to assemble house. Getting your slab nice and even might take a few minutes but it’s worth the effort! The house pieces are thicker, they don’t spread while baking, your edges are nice and straight and stay that way. I’m here to convince you to go with this method because it is the best!
- Those “scrap” pieces of gingerbread are your little gift for making the house, eat them up like cookies hot off the pan or dip them in milk when they get a little harder once cooled.
- I often make gingerbread houses over multiple days. I’ll do all of my dough making, baking, and cutting my pieces on one day. Assemble the house and decorate another day. It takes a lot of time for all of the steps but that’s half the fun.
- When making the royal icing you can have NO LEFTOVER GREASE in your bowl. Make sure your bowls, spoons, and icing bags are totally free from grease. That fat keeps the icing from coming together and will ruin the batch.


Can’t wait to make this! Could you please email me the templates?
Sent!
The house is darling and the recipes for the house and icing look easy. My grandkids are looking forward to creating their own houses. However, I wasn’t able to download the house templates.
I just checked everything and it’s work on my end. If you email directly I can send them to you!
Looking forward to use this recipe this Christmas, however the link to the cutout isn’t working. Would you be able to send it me?
I just checked everything and it’s work on my end. If you email directly I can send them to you!
Love this recipe! It is a family favorite and my kids beg every Christmas season for me to make again. I feel great about letting them eat it too since it is all homemade! Easy instructions and tips too. Win, win, win!
Hi Melissa, can I substitute the molasse with same amount of honey? Thanks
Yes, it’ll work great!
I did not use this recipe (I went with salt dough) BUT I used the template for the large house. Its Perfect!!!! Great size for a table centerpiece or on the mantle. Im actually hoping it lasts a couple years.
I wish I could share a photo.
Thank you for sharing!