This post may contain affiliate links. Please read our disclosure policy.
It’s so easy to make silky smooth Slow Cooker Yogurt at home with just two ingredients and prep time of only 5 minutes! This simple recipe saves money, reduces waste, and delivers fresh yogurt without any additives or preservatives.
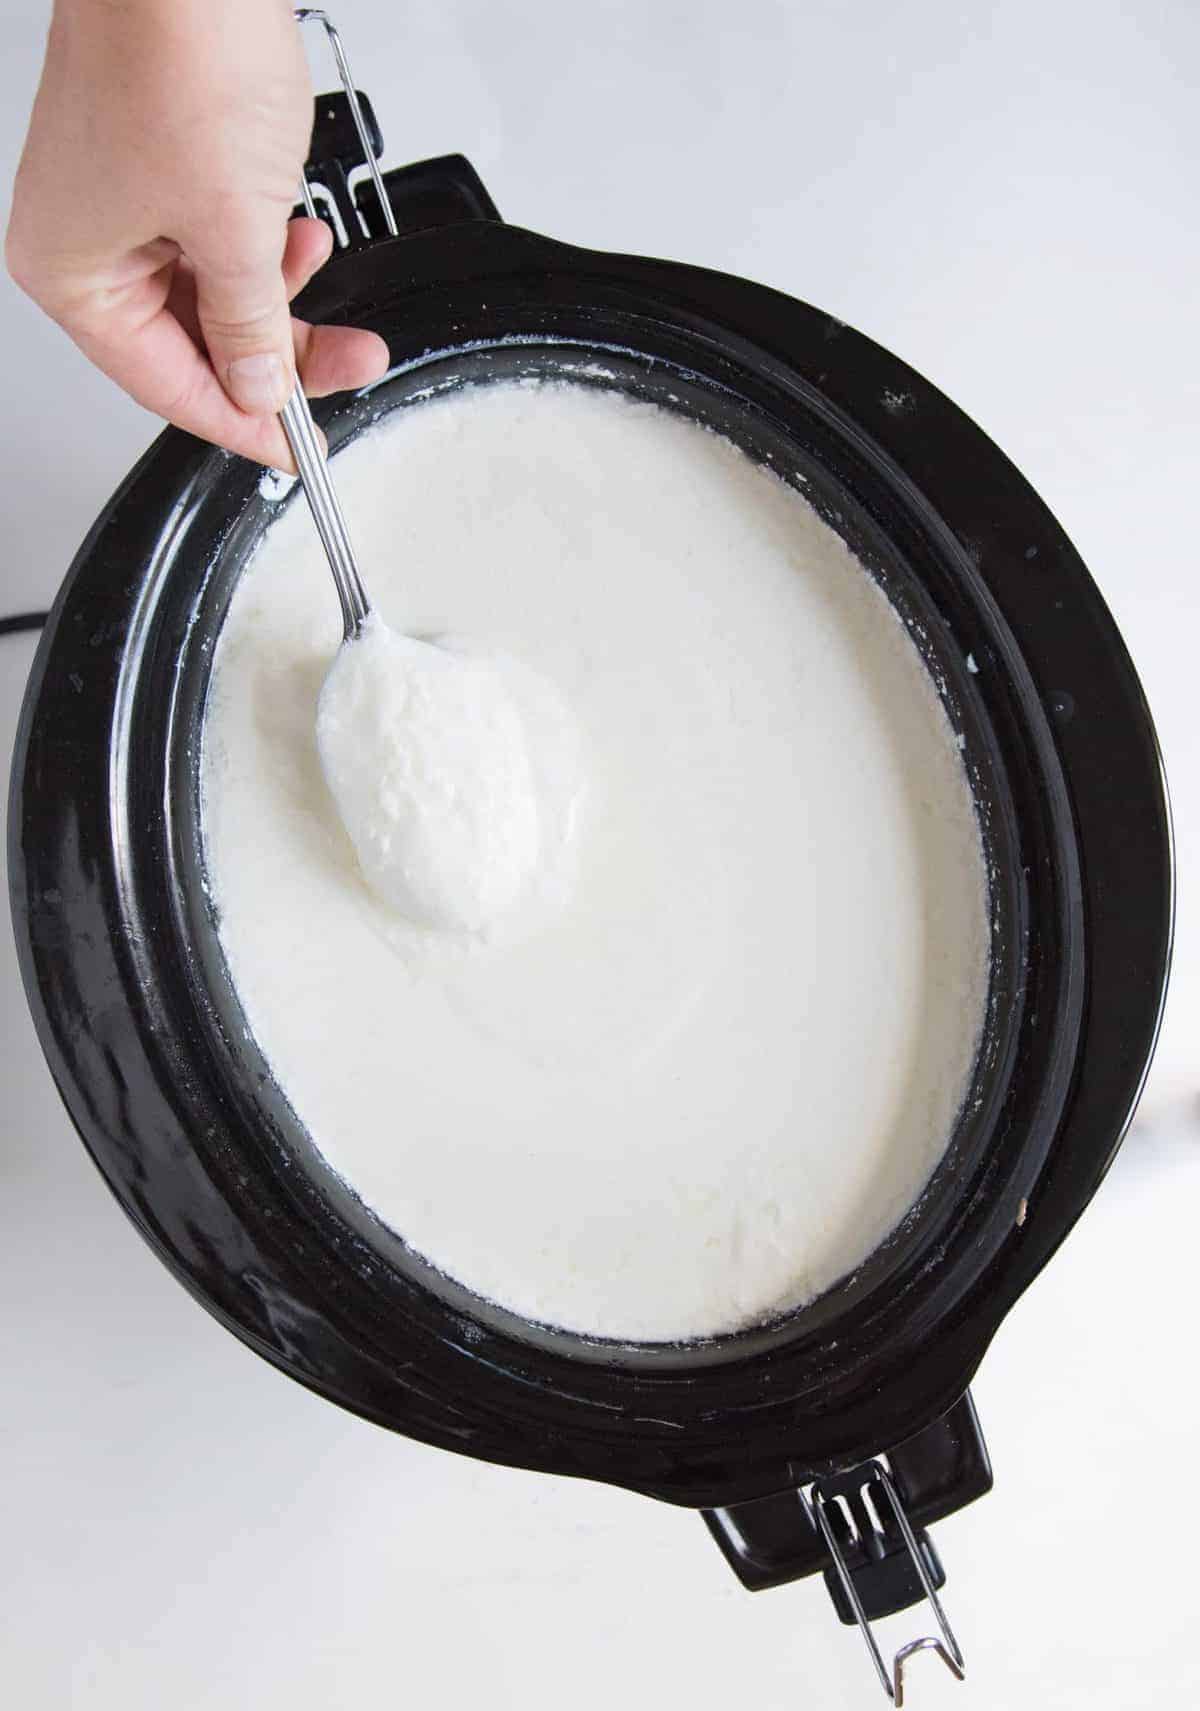
🥛Just 5 minutes of prep, and then slow cooker does the rest while you sleep. Such an easy way to get another option for homemade breakfast or snacks into your meal rotation!
My 2 Best Tips For Making Slow Cooker Yogurt
- Temperature Matters: The first time you make this recipe, use a thermometer to verify your slow cooker’s heating pattern. The ideal temperature for yogurt cultures is 110-115°F (43-46°C). Too hot and you’ll kill the cultures; too cool and they won’t activate properly.
- Quality Starters Make Quality Yogurt: Choose a high-quality plain yogurt with live active cultures for your beginning starter. Brands like Mountain High, Fage, or Chobani work well. Then you can start saving your own starter from each of your homemade batches. After a few batches, you may notice your yogurt becoming less thick—this is the time to introduce a fresh commercial starter.

🩷 Melissa
I like to start this in the afternoon so that it’s ready to sit for its long 8-12 hour warm resting period overnight. We then wake up to fresh yogurt, and I’ll serve it with fresh fruit and some homemade granola.
This is a great way to to get organic yogurt on the cheap. You can buy a carton of organic milk and turn it into yogurt for about half the price of organic yogurt.
It is plain yogurt, but you can add honey, jams, fresh fruit, and just about anything else you like. I also use it in place of sour cream in most recipes.
Slow Cooker Yogurt
Video
Ingredients
- 1/2 gallon (8 cups) whole milk (you'll get a thinner product with a lower fat content milk)
- 1/2 cup commercial plain yogurt that says “Live and Active Cultures” on the tub, I have great success with Mountain High yogurt for my culture.
Instructions
- In a large crock pot, add the milk. Add the lid. Turn it on low for around 2 ½ hours.
- After that time has passed, unplug the crock pot and let it sit for 3 hours. I always set a timer for these or I don’t remember.
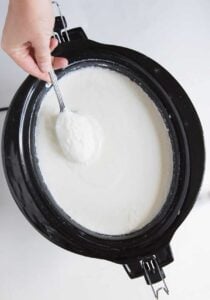
- After the 3 hours has passed, stir in the ½ cup of yogurt. Replace the lid of the crock pot and cover with two big towels or a blanket. Let rest for 8 to 12 hours (overnight works well). In the morning you'll have yogurt!

- Place it in a half-gallon mason jar and refrigerate for a few hours before serving. It will thicken up in the fridge. Keep a ½ cup of this yogurt for your next batch and say goodbye to buying yogurt!
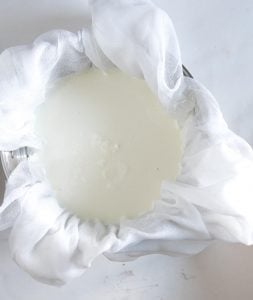
- You can also let the yogurt strain in cheese cloth in the fridge for a few hours and you'll get a thicker Greek yogurt.

Notes
- I highly recommend getting a little instant-read thermometer to make homemade yogurt since it’s all about the temperature.
- The goal is to scald the milk which takes place around 180°F. Check it with a thermometer the first time to see if the “warm” setting is warm enough or if maybe an hour and 45 minutes would work on low. Once you figure it out, I don’t think you would have to use the thermometer every time.
- After the milk is scalded, the waiting time is meant to bring the milk down to around 110-115°F so it’s still warm but won’t kill your yogurt culture.
- Serve with fresh fruit and granola
- Make yogurt bowls: 5 Easy Healthy Yogurt Bowl Ideas
- Homemade Fruit on the Bottom Yogurt Cups
- 4 Ingredient Healthy Strawberry Frozen Yogurt (5 minute recipe!)
- It also goes great in smoothies like my Key Lime Pie Smoothie, Strawberry Kiwi Smoothie, or Avocado Smoothie.
- Or try it in these amazing Soft and Puffy Greek Yogurt Sugar Cookies!
Nutrition
Recipe FAQs
Homemade yogurt typically stays fresh in the refrigerator for 1-2 weeks when stored in an airtight container. The flavor may become more tart over time as the cultures continue to slowly develop.
Several factors can affect thickness: using ultra-pasteurized milk, milk with lower fat content, culture that wasn’t active enough, or temperature issues during incubation. For thicker yogurt, try using whole milk, ensuring proper temperatures are maintained, or strain the finished yogurt through cheesecloth.
After your yogurt is made, simply line a fine-mesh strainer with cheesecloth, place it over a bowl, and pour in your finished yogurt. Allow it to drain in the refrigerator for 2-4 hours for a thicker Greek-style yogurt. The longer it strains, the thicker it becomes.
More Healthy Snack Recipes to Consider
Smoothies
25+ Best Smoothie Recipes
Dip Recipes
Lemon Garlic Hummus Recipe Without Tahini
Healthy Snacks
Medjool Date Protein Bites: No-Bake Sweet Treat
Did you make this recipe? Leave a ⭐️ review and share it on Instagram, Facebook, or Pinterest!





I love this recipe. The timing works perfectly. Last time I added a cup of heavy cream to make it richer and thicker. It was divine.
Jessica, did you add the heavy cream in the beginning, or after the scalding?
If I double the recipe how do I need to adjust the timing of heating the milk, waiting for it to cool, and does it take longer than the 8-12hrs to turn into yogurt? I tried it yesterday and previously I’ve had great success with the original recipe but this time it came out much more runny than in the past..almost like not all of the milk had turned into yogurt. Let me know what you think. I added about 1cup of plain yogurt as well instead of 1/2cup, since I doubled the recipe..but I don’t know if that was necessary.
It can take longer than that time period if your house is chilly and the timing should be about the same for that much milk, do you have a thermometer so you could check on things?
Thanks for trailblazing the process for me. Is there any way to use the “whey”? I hate to toss if I can use it for something else. Thanks
yep, you can use it in bread making as part of the water or liquid (adds a sour flavor like sourdough), you can water plants with it, you can add it to smoothies, google whey uses, it’s a really cool product! I don’t throw mine away because there’s so much you can do with it.
Thanks for this recipe. We have tried 4 or 5 ways to make yogurt with our raw milk. This worked. The only modification we needed to make was with our crockpot heat setting. At 2.5 hours it was still hovering around 160 so we upped it to high for about 25 min and checked temp frequently until it hit 180. The other thing we did different was that we put the inner portion of the crockpot in the stove overnight, no heat, light on.
I used to make this often, but it’s been a few years. My crock pot is older plus the timer got turned off. So basically I didn’t check the temp when I turned off the crockpot. I just checked it now for 110-115 but it’s down to 60. It’s been around 3 hours. Is the milk done for or can I safely start over with this milk?
It’s fine to start again! And you don’t have to get all the way to scalding again, you just did that, just get it up to about 100 so the yogurt is warm.
I can’t wait to try this out. I’ve been contemplating making my own yogurt for a few months now. Store price increases for yogurt have nudged me to go ahead and give it a try.
Most recipes I’ve come across for homemade yogurt recommend warm water baths while culturing the yogurt. I wanted something more failure tolerant. I read a comment on another site about using a crock pot and decided to research and here I am.
Thank you for posting the recipe.
I love this- it turns out a bit runny, but perfect for overnight oatmeal! I’m going to buy sone powdered milk next time I go to the store to thicken it up. Thank you!
Can you do this with larger quantities of milk? Say, 1 gallon instead of 1/2 gallon at a time?
Yep, it works very well
I’ve read powdered milk is an oxidant.
If I need 1/2 cup starter for half gallon do I need 1 cup for a gallon? Or will it just take longer to ferment?
You don’t need to increase the starter for a bigger batch, that amount will still work and generally takes the same amount of time to ferment though it takes longer to heat up and cool back down because of the volume.
I have used this recipe four times now, twice using UHT whole milk and twice using fresh whole milk. Both worked really well proving that you don’t need to spend money on a yoghurt maker to be successful at making your own yoghurt. I personally prefer the whole fresh milk as it set a bit more than the UHT but still both delicious. Thank you for the recipe.
I made this…thankyou so much. It turned out lovely
Your ingredient list mentions 1 1/2 C yogurt, then the recipe instructions says to add 1/2 C of yogurt. Please clarify the right about of yogurt to add to the milk for this particular recipe. Thanks!
Hmmmm, not sure where you are getting 1 1/2 cups yogurt from, the ingredient list just says 1/2 cup, that’s all that you need for the starter.
I am going to try this even though I’m a bit dairy sensitive but I’ve been able to tolerate Mountain High Yogurt so….but will this work do you think made with full fat coconut milk?
Coconut milk won’t work for this recipe but I have seen it with others!
I am lactose intolerant and I am able to eat this yogurt recipe (using whole milk, no less) without lactase and I have no problem. I believe if the yogurt process goes to completion (i.e., you follow all of the minimum times), then all of the lactose in the milk gets broken down by the yogurt culture.