Amazing No-Knead Refrigerator Pizza Dough
on Mar 06, 2019, Updated Mar 24, 2025
This post may contain affiliate links. Please read our disclosure policy.
This amazing No-Knead Refrigerator Pizza Dough can be thrown together with just 4 ingredients! An easy dough that develops incredible flavor right in your refrigerator for a restaurant-quality pizza crust with minimal effort — perfect for busy families who still want delicious homemade pizza!
Homemade pizza doesn’t have to be hard or fussy and this recipe is going to prove it. Plus, the taste and texture of refrigerator pizza dough is the best. It’s so chewy and delicious that you might just switch to this for all of your homemade pizza dough needs.
All you do is stir together a little flour, water, salt, and yeast and then you let it sit in your fridge until you want to use it. It’s best after 24 hours in the fridge and can last up to 3 days. This is a great make-ahead dough recipe that cuts off a lot of time when it comes to pizza night!
Table of Contents

Why You’ll Love This Refrigerator Pizza Dough Recipe
- Set-It-And-Forget-It Convenience: Just 5 minutes of mixing and your dough develops amazing flavor in the refrigerator while you tackle other priorities. No babysitting required!
- No Kneading Required: Say goodbye to flour-covered countertops and sticky hands. This technique skips the traditional kneading process entirely.
- Budget-Friendly Family Meal: Create restaurant-quality pizza at a fraction of delivery costs. One batch makes two large pizzas — enough to feed a hungry family.
- Customizable For Personal Pizzas: Divide the dough into smaller portions to create personal pizzas where everyone chooses their own toppings.
- Impressive Long-Term Storage: Keep the dough in your refrigerator for up to 3 days (or even longer with proper storage), allowing you to plan ahead for busy weeknights.
🍕 I have quite the collection of amazing homemade pizza recipes that keeps our Friday pizza nights from getting boring!
Recipe Ingredients
- Bread Flour
- Instant Yeast
- Salt
- Water
See the recipe card below for full information on ingredients and quantities
How to Make No-Knead Pizza Dough
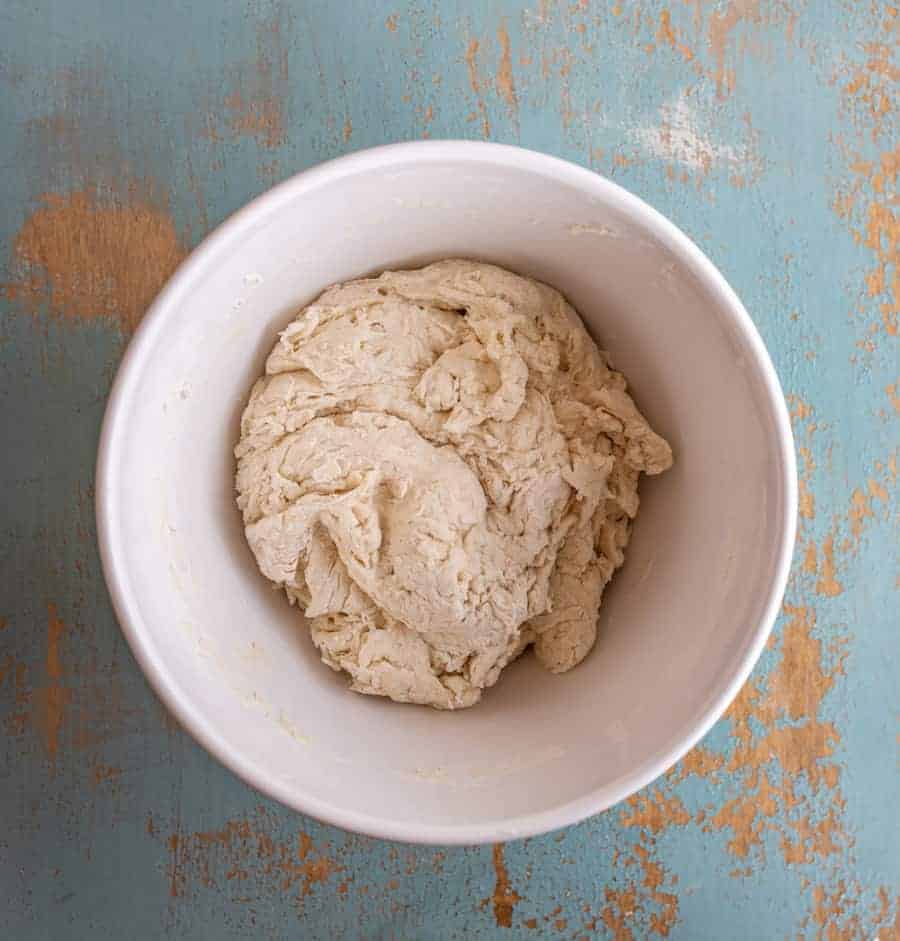
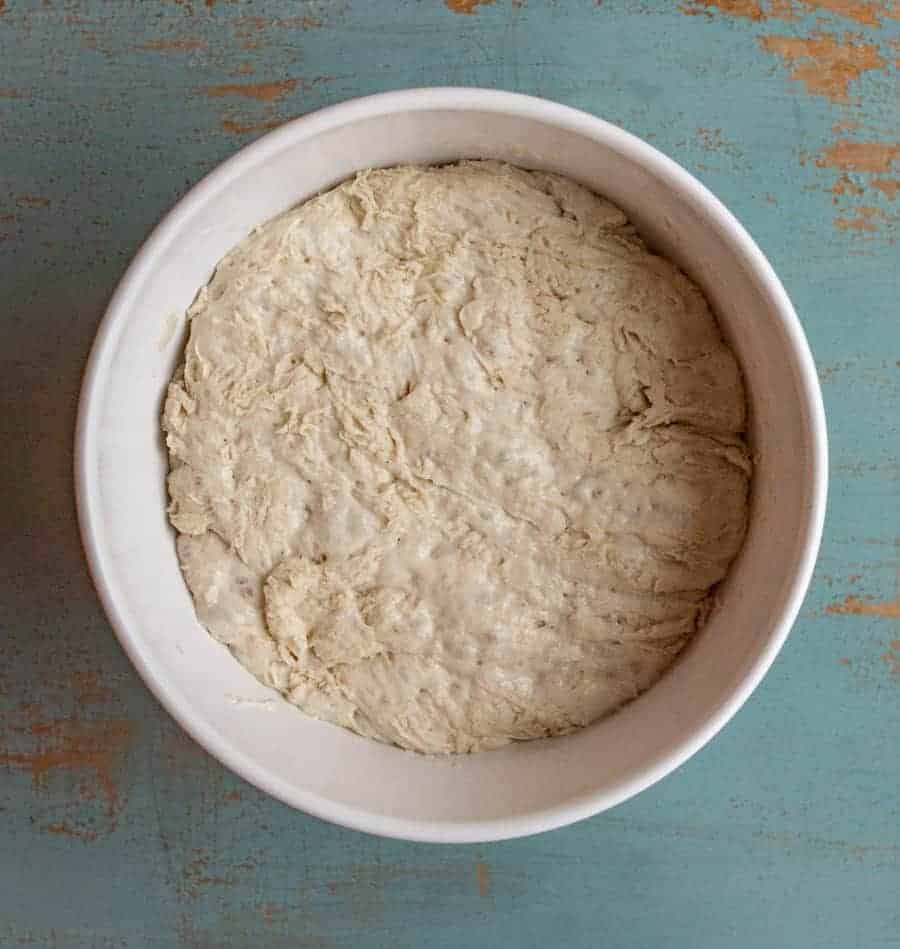
Step 1: Add the flour, yeast, and salt to a mixing bowl and stir to combine. Stir in the water until no clumps of dry ingredients remain in the mixing bowl. Cover the dough with plastic wrap and transfer the bowl to the fridge.
Step 2: Remove the dough from the fridge an hour before you plan on using it.
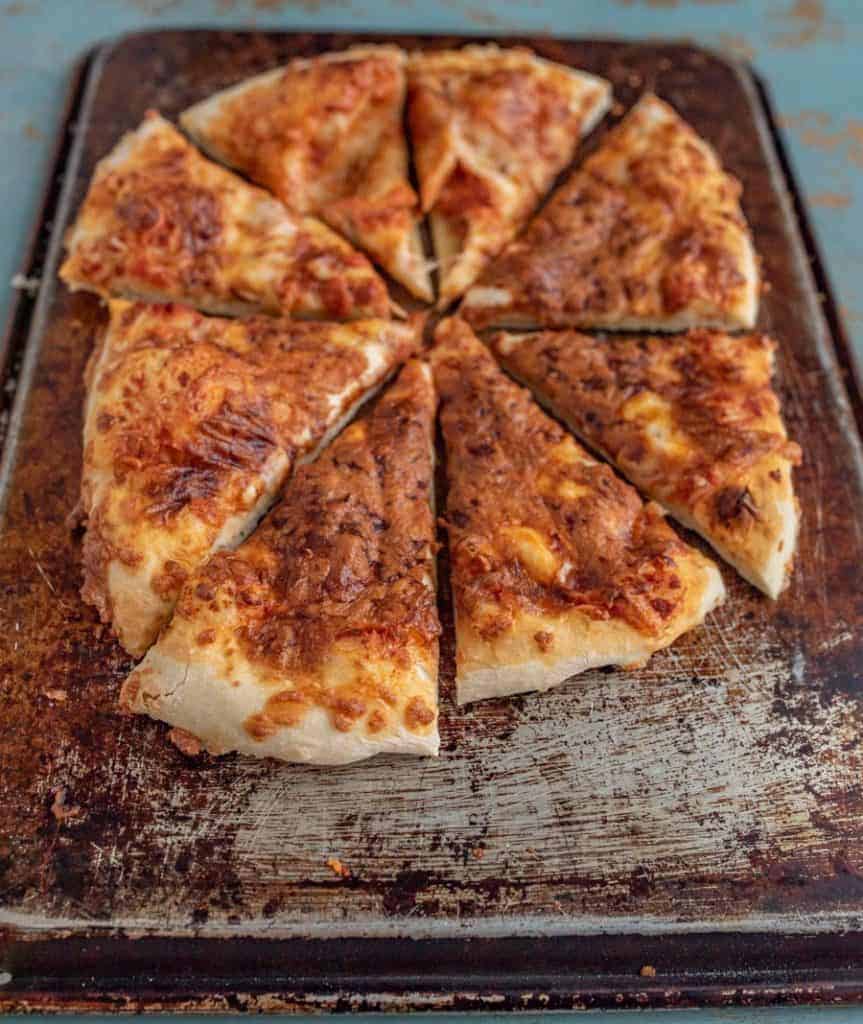
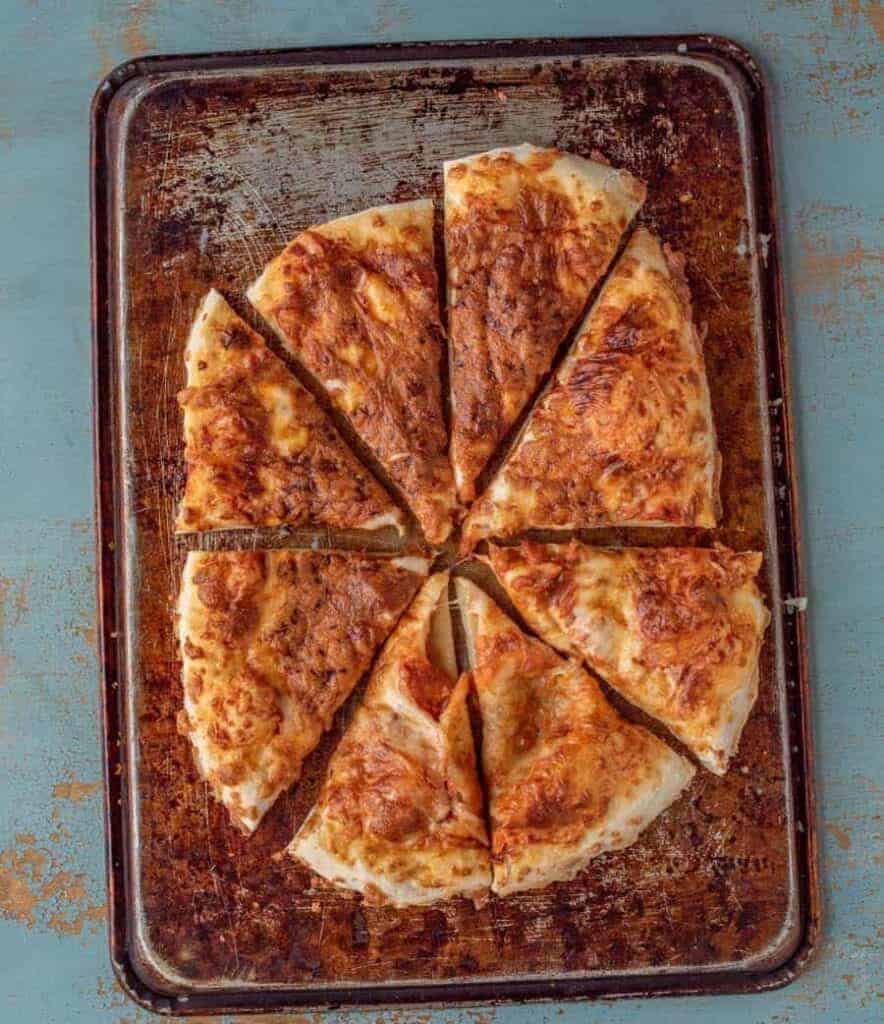
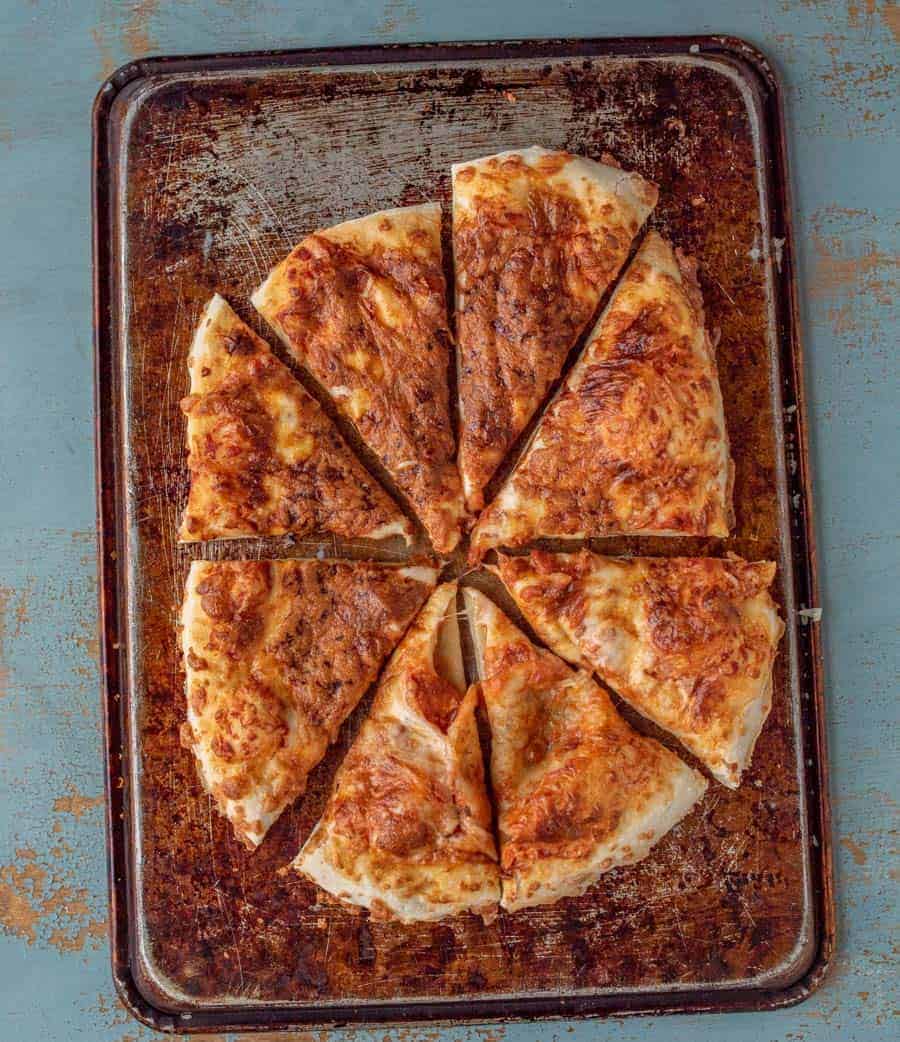
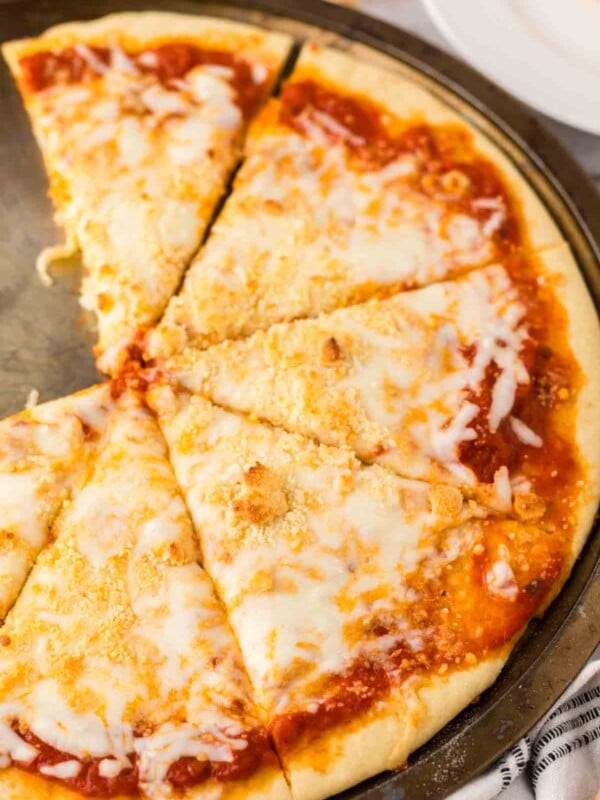
Step 3: When you are ready to use your dough, preheat the oven 500°F and divide the dough into two pieces. Top your dough with your favorite toppings and bake for about 15 minutes, or until golden brown.
Recipe FAQs
Looking for the best (and easiest) pizza sauce recipe? You’ll need 2 tablespoons olive oil, 2 cloves garlic, and 1 (28-ounce) can crushed tomatoes. In a small sauce pan, cook the oil and garlic together over medium heat until the garlic starts to smell good. Add the tomatoes and simmer until it thickens a bit, about 15 minutes. Season with salt and pepper to taste. DONE! Really. Three ingredients and it tastes amazing!
Allowing your pizza dough to sit in the fridge for at least 24 hours helps the ingredients settle and gives the yeast time to work. This helps produce a delicious crust that tastes just like traditional kneaded pizza doughs.
Absolutely! After the initial 24-hour refrigeration period, divide the dough into portions, wrap tightly in plastic wrap, place in freezer bags, and freeze for up to 3 months. Thaw overnight in the refrigerator, then allow to come to room temperature for an hour before using.
Yes, you can substitute all-purpose flour, though your crust won’t be quite as chewy. Bread flour has higher protein content that develops more gluten, creating that classic pizzeria-style chew. If using all-purpose, you might want to reduce the water slightly to about 1¼ cups.

Expert Tips
- No Sticking: Make sure to roll your pizza dough out on a floured surface so it does not stick to the counter.
- Rest Time: Allow your pizza dough to rest in the fridge for a minimum of 24 hours and up to 30 days.
- Small Pizzas: You can divide your dough into smaller pieces if you want to create personal sized pizzas.
- Watch Closely: Keep a close eye on your pizza while it is in the oven so that it does not burn.

Extra Tips For A Perfect Pizza Crust
Crispy Crust: For a crispier crust, try preheating your oven (with the stone or baking sheet inside) for a full 45 minutes rather than 30. You can also brush the edges with olive oil before baking. The longer fermentation time (2-3 days) also tends to produce a crispier result.
Thick Crust: Instead of dividing the dough in half, use two-thirds of the dough for a single pizza. Roll it to about ½-inch thickness and extend the baking time by 3-5 minutes. Just watch carefully to ensure the bottom doesn’t burn!
Rising Guide: This no-knead dough won’t rise dramatically like traditional pizza dough. It should increase in volume somewhat and develop small bubbles throughout. The beauty of this recipe is that it’s very forgiving—even if it doesn’t appear to have risen much, the slow fermentation is still developing flavor.
More Pizza Recipes to Consider


Did you make this recipe? Leave a ⭐️ review and share it on Instagram, Facebook, or Pinterest!
Amazing No Knead Refrigerator Pizza Dough
Ingredients
- 3 cups bread flour
- 1/2 teaspoon instant yeast
- 1 1/2 teaspoons salt
- 1 1/2 cups water
Instructions
- In a medium bowl, add the flour, yeast, and salt. Stir to combine.
- Add all of the water and stir until the mixture comes together and there are no dry spots. No kneading required, just stir until it's a uniform texture.
- Cover the bowl and dough tightly with a lid or plastic wrap and place the dough in the fridge.
- Keep in the fridge for at least 24 hours and up to 3 days. The longer it rests, the chewier the baked pizza crust will be.
- An hour before you plan to use the dough, remove it from the fridge and let it rest at room temperature.
To make the pizza:
- While the dough is resting, preheat your oven to 500°. If you have a baking stone, put it in the oven to heat, too. I would recommend using a stone for baking this pizza. If you don’t have a stone, you can turn your biggest cookie sheet upside down (so that the flat side is up) or use a rimless sheet. If you are using a stone, let the stone heat for 30 minutes. If using a baking sheet, let it heat for 10 minutes.
- When the oven is hot, cut your dough in half. Place half of the dough on a piece of parchment paper that is 18 inches long. Using a rolling pin, roll the dough (on top of the parchment paper) into a 12 to 14 inch circle. The dough should be about a quarter-inch thick. Use extra flour to keep the dough from sticking while you roll it out.
- Top with 1 cup of pizza sauce, 1 1/2 to 2 cups of shredded mozzarella, and toppings of your choice.
- When the pizza is all ready, slide the pizza, which is on the parchment paper, onto a rimless cookie sheet or one that is upside down. This will help you get the pizza to the oven.
- Open the oven and slide the pizza still on the parchment paper from the cookie sheet onto the hot baking stone or hot cookie sheet. I just tug on the edge of the parchment paper with my hands and slide it onto the stone. BE CAREFUL! Your oven is super hot, obviously!
- Bake for 10 to 15 minutes until the top is bubbly and the edges are starting to brown. When the pizza is done, tug the edge of the parchment paper and slide the pizza back onto the cookie sheet you used to transfer it to the oven. Again, be careful!
- Let your stone reheat for 10 minutes. While the stone is heating, repeat the whole thing with the second half of the dough and bake the same way.
Notes
- Make sure you roll your pizza dough out on a floured surface so it does not stick to the counter.
- Allow your pizza dough to rest in the fridge for a minimum of 24 hours and up to 30 days.
- You can divide your dough into smaller pieces if you want to create personal sized pizzas.
- Keep a close eye on your pizza while it is in the oven so that it does not burn.


Have you ever tried to freeze this dough? If so, what would be the instructions for that?
He calls my crust Kimmie crust because it was my sister’s recipe. He said the pizza was really, really good this time….go figure….it was Melissa crust!!!! I bake the crust only for half the cooking time, cool
and add pizza sauce, cheese, topping, wrap and freeze them up. When he wants a quick pizza, he pulls it out, removes the wrapping and bakes at 450 for 15 minutes or so. Thanks for the new crust recipe!!!!
Awesome idea! I love it.